While testing your WordPress website’s page with a page speed testing tool such as Google PSI, you may encounter this error – “add expiry headers”. What is this error, and how to fix it? Expires headers, in layman’s terms, tell the browser to save a copy of a static file and load this file from the folder where it has saved this file (let’s call this folder the cache folder). What is the benefit of this? When the browser saves a copy of the file on the PC, your site will:
Require lower bandwidth: Imagine that the size of the stylesheet file of the WP website (style.css) is 1 megabyte. If the web server doesn’t add an expiry header to this file, it will send this file each time a user opens a page of a WordPress website.
If one visitor accesses your page 20 times, the browser will request the CSS file 20 times, and 20 megabytes of data would be transferred by the server to the visitor’s PC. If the expiry header was present, only 1-megabyte data would be transferred. The same thing applies to images, one of the most downloaded files on a website. Images can reduce the speed of the website drastically. Thus, you must always optimize the images of your WordPress website. Anyways, if the pictures of the website don’t have an “expires header”, the browser will request the file from the web server each time the page is opened.
Will be faster: As the browser loads some part of a website from the storage memory of the visitor’s computer instead of requesting the same from the web server, it will load fast.
Limitations: Although “expires header” is a useful feature, it has one limitation. It is useful only when the website is revisited. A website can benefit from this header only if it is visited frequently by the same visitor. This visitor can be a bot or a normal user. If the visitor has never accessed the page, the static files will be sent to the visitor’s browser.
You can visualize this with the pagespeed checker tools such as Pingdom, GTMetrix, etc. The tools show the flow of HTTP requests and responses. If you observe the flow carefully, you’ll find out that the browser asks the webserver to send each file on the page. If the page has 30 resource files, the browser will request each file unless the web server has set the expires header for the static file and the page has been opened earlier by a user.
The following are the files that should have this header:
- CSS, JS, PDF.
- Jpg/jpeg, PNG, webp, etc.
Use a plugin
The easiest way to add expires header in WordPress is to use a plugin. Caching plugins such as WP Rocket or LiteSpeed cache can add the same to the static files of a website. WP Rocket doesn’t require any configuration, as it will start adding the header to the HTTP response immediately after you activate the plugin.
In LiteSpeed cache, you’ll find a “browser” tab on the settings page. Click this tab and click the cyan-colored toggle option to activate browser caching. Below the button, you’ll find a textbox to cache the “browser cache TTL” time. You should enter the seconds for which you want the visitor’s browser to cache the files. The plugin will convert seconds to days/months/hours automatically.
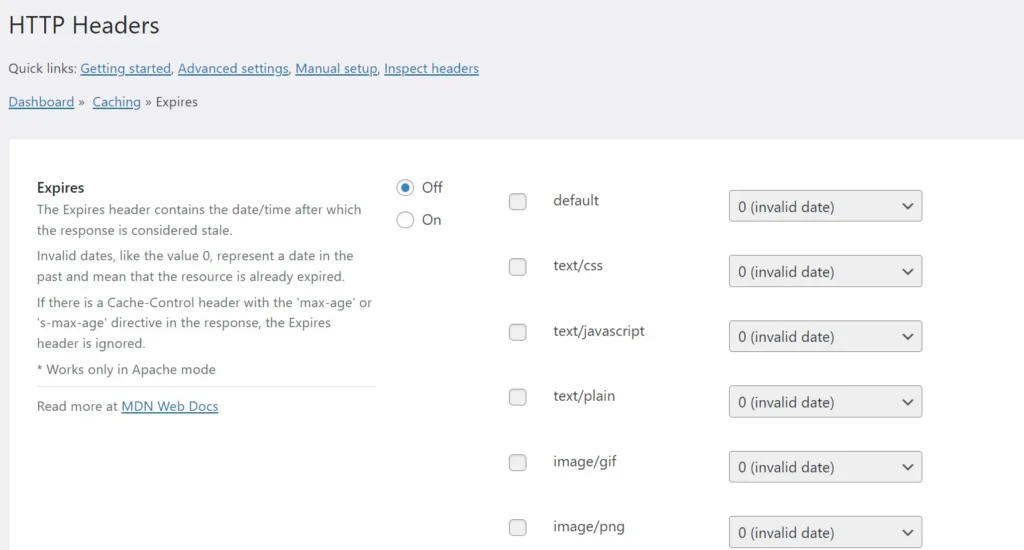
If you’re already using a caching plugin and don’t want to switch to another similar plugin for adding “expires time” to files, you can use the free HTTP Headers plugin. This WP plugin can add various types of headers to the HTTP response.
To enable expire headers for static resources with this plugin, click the caching option on the HTTP Headers settings page and click the “edit” option that appears at the end of the “expire header” row. When you do so, the plugin shows a radio button to enable the header and a vertical list of checkboxes indicating the file types. Each checkbox is accompanied by a drop-down list. From the dropdown list, you should choose a time for which you want the browser to cache the chosen file.
Manual method
In this method, you will have to open the Nginx/Apache configuration file and add a browser caching rule to it. If your website is powered by the Apache web server, you’ll have to enable the mod_expires module and create a caching rule for static files. For example, the following rule [source] will enable the header for files of these formats – PDF/CSS/JS:
ExpiresActive On;
<FilesMatch "\.(jpg|css|js)$">
ExpiresDefault A29030400
</FilesMatch>
If the Nginx web server is handling the HTTP/HTTPS traffic of your website, the following rule will make the browser cache the PDF, JS, and CSS files for 15 days:
location ~* ^.+\.(pdf|css|js)$ {
    expires 15d;
}Note: Back up the htacces or the Nginx configuration file before you make any changes to it. You can modify the code as per your requirement.