Although WordPress developers check their products thoroughly before publishing them in the WordPress repository, they can’t test their code with each item available in the repository. This is because the repository has a vast number of items. If the developers decide to test their code with each WP product, it will take months for the developers to roll out updates or publish a new item in the repository. Thus, if the developers publish an extension incompatible with a theme or plugin your website is using, the site may crash. To avoid this situation, the end-user can create a staging site and try out the item before using it on a live site.
What is the benefit of a testing website? One of the reasons why people create a staging WP site is to test the extension or theme before using it on a live or production environment. If the website is not affected after installing a theme or extension, you can use the theme/plugin on a site.
How to create a site for the purpose of testing? Simple. Use one of the following extensions.
WP Staging
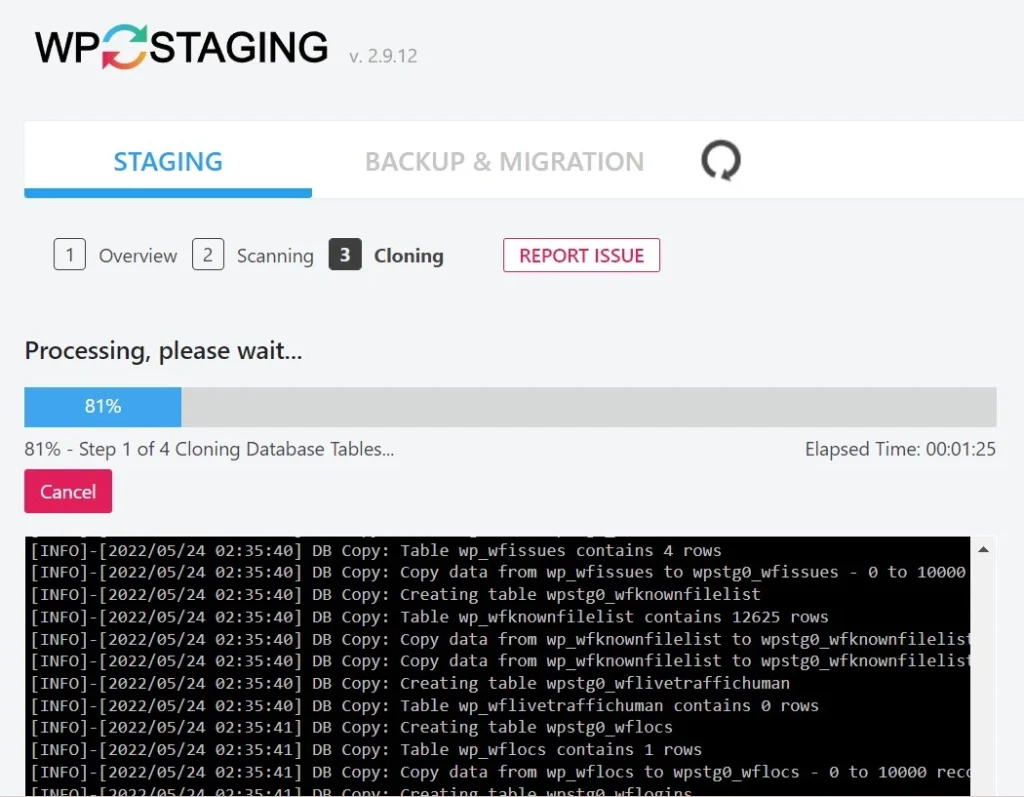
WPST is the most popular plugin for creating sites for testing purposes. Its rating is 4.9, and the number of people using it is 60000. WPST creates a test site when the user executes these steps – overview, scanning, and cloning. The overview step is the step to initiate the staging process. In the scanning step, you can choose the parts of the sites you want the extension to clone. The part can be all or one of these – database tables, files, and advanced settings.
Next to the “start cloning” button, you’ll find a link “check disk space”. WP Staging shows the minimum space required for the testing website when you click this link. When you choose the staging website parts and click the “start cloning” button, it will display a progress bar and a terminal below it. The terminal boasts the background activity of the plugin in real time, and the progress bar will be updated each time WP-S completes a background task. WP-S enables you to cancel the staging process. If the process is stuck, click this button to terminate it. When WP-S has successfully cloned the data, it will display the URL of the test website.
WP Vivid
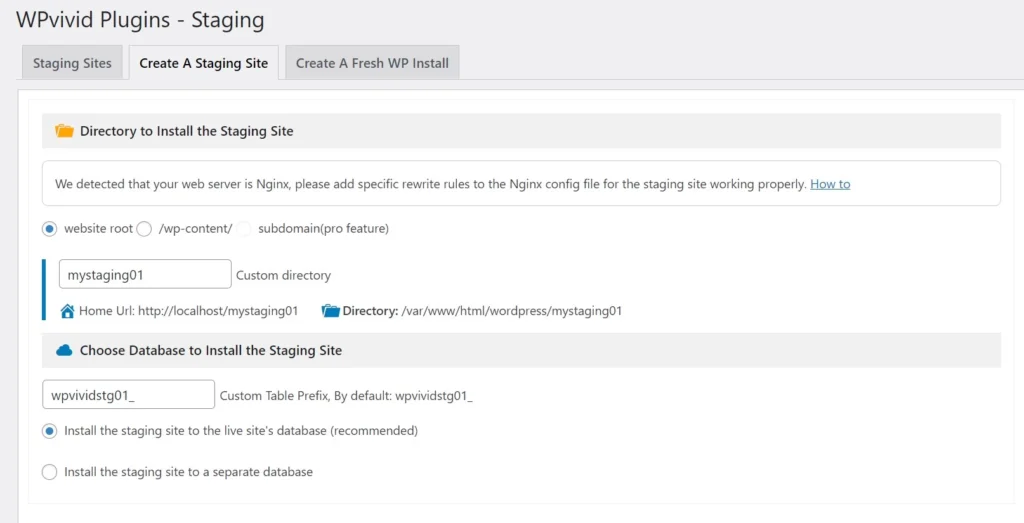
WP Vivid is another top WordPress staging extension you can use to create a testing site. It shows a form the user must fill in with these details – the directory where the website must be set up and the database table prefix of the test portal. It also displays a radio button to choose the location of the website text/settings/configuration data. WPV can create a new database and store the data in it or create new tables in the existing database and store the staging site’s data in it. It lets you select the data you want to copy to the website.
When you fill out the form fields and choose radio buttons, click the “create now” button to make WP Vivid create the website that you can use for testing purposes. In addition to the staging portal, WPV lets users create a fresh WordPress installation. The new WP installation is similar to the staging environment module, but it has some extra options you won’t find in the earlier. For example, you can choose the plugins or themes you want to use on the testing site.
Duplicator
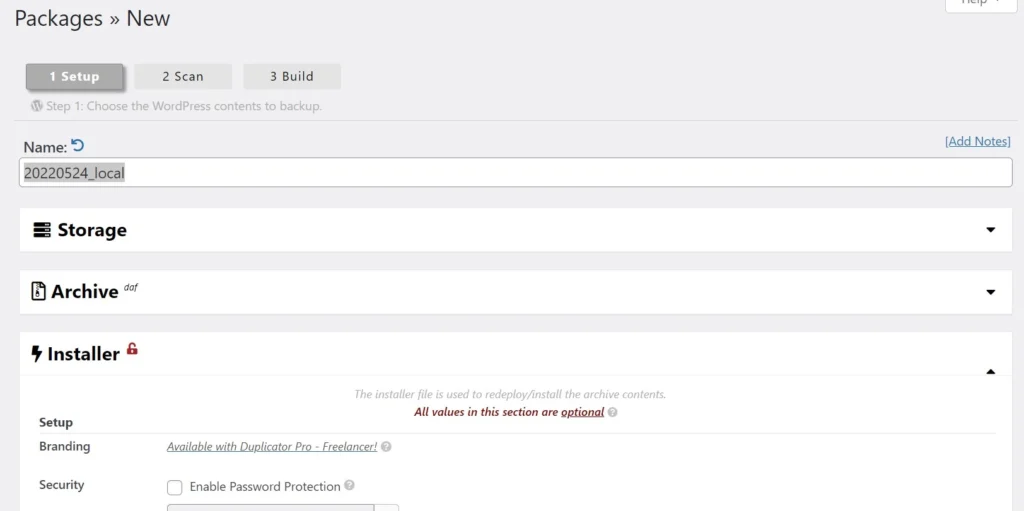
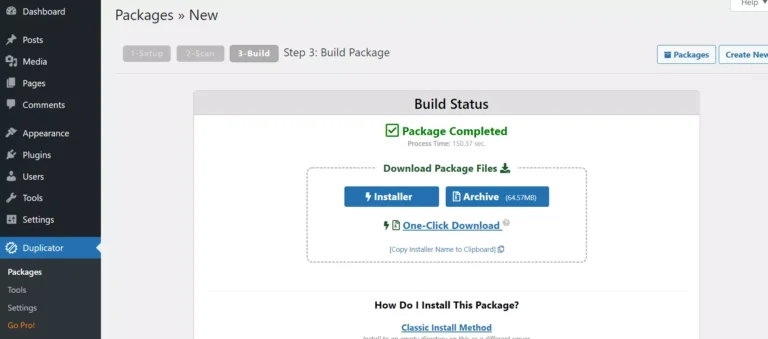
Duplicator not only enables you to create backups and migrate a site but also lets you create a test website. To create a testing website with it, you must first create a package by clicking on the “add new” button displayed on the extension’s settings page, clicking the button shown in the form, and then download the installer.php PHP file on your PC. Duplicator will create this installation script file automatically.
Once you download the file, create a folder on the server in the WP installation directory and copy the downloaded PHP file to the folder. Open the file in the browser i.e. If your site name is example.com and you’ve created the xyz folder, then open this URL example.com/xyz/installer.php in the browser. Now follow the instructions displayed on the page.
BlogVault
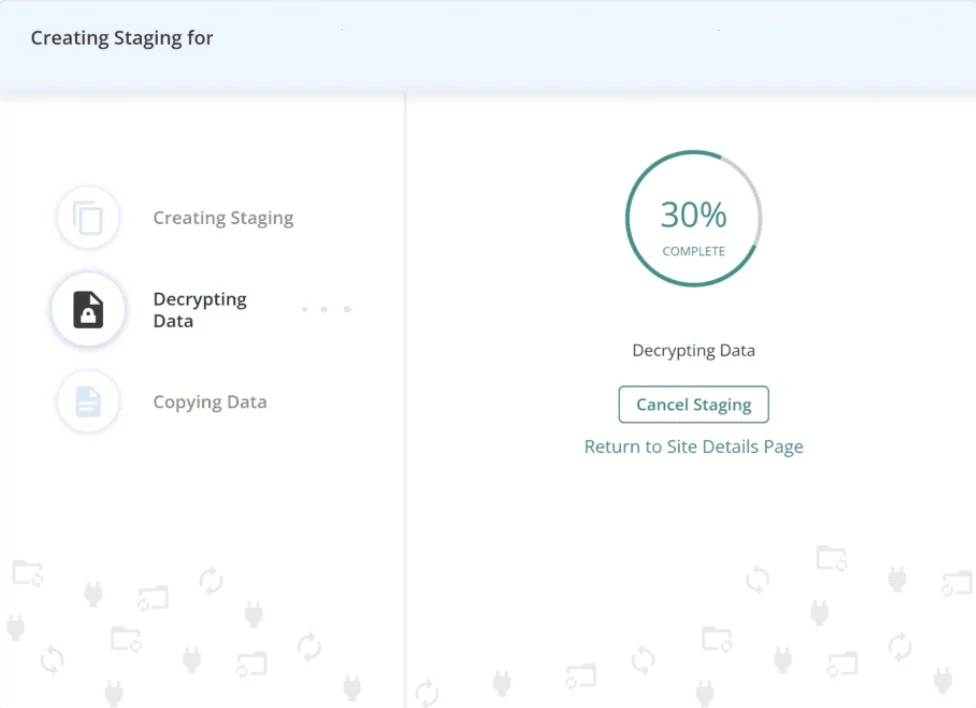
The above plugins will create a staging site on your server. BlogVault will create one on its own server and share its URL with the user. To create a test portal with it, click the “Add Staging” option, choose a backup, and click the continue button. BlogVault creates the website from the backup. It will show the progress of the testing site in real-time. While doing so, it will encrypt your portal’s data.
When BlogVault is done creating the test website, it will send login credentials for this portal to the user’s email ID. The user must sign in with the username and password BlogVault has sent to the email address. BlogVault free plan doesn’t support the “testing website” feature. You must buy a paid plan for the plugin to use the feature.
Another way to create a staging portal is to use a hosting company that offers a staging environment. The environment is one of the features of these hosting companies – Cloudways or WP Engine, InMotion or Siteground, Dreamhost, or Hostinger. If you use one of these two hosting companies, you won’t have to install any WP extensions. You just have to click on the test site’s URL displayed in the admin panel of the hosting account to open the testing site.
Closing words: The above plugins let users create a testing site in minutes. They show a form where you must enter some details. The portal generated by them will be based on your input.